Building out a machine learning operations (MLOps) platform in the rapidly evolving landscape of artificial intelligence (AI) and machine learning (ML) for organizations is essential for seamlessly bridging the gap between data science experimentation and deployment while meeting the requirements around model performance, security, and compliance.
In order to fulfill regulatory and compliance requirements, the key requirements when designing such a platform are:
- Address data drift
- Monitor model performance
- Facilitate automatic model retraining
- Provide a process for model approval
- Keep models in a secure environment
In this post, we show how to create an MLOps framework to address these needs while using a combination of AWS services and third-party toolsets. The solution entails a multi-environment setup with automated model retraining, batch inference, and monitoring with Amazon SageMaker Model Monitor, model versioning with SageMaker Model Registry, and a CI/CD pipeline to facilitate promotion of ML code and pipelines across environments by using Amazon SageMaker, Amazon EventBridge, Amazon Simple Notification Service (Amazon S3), HashiCorp Terraform, GitHub, and Jenkins CI/CD. We build a model to predict the severity (benign or malignant) of a mammographic mass lesion trained with the XGBoost algorithm using the publicly available UCI Mammography Mass dataset and deploy it using the MLOps framework. The full instructions with code are available in the GitHub repository.
Solution overview
The following architecture diagram shows an overview of the MLOps framework with the following key components:
- Multi account strategy – Two different environments (dev and prod) are set up in two different AWS accounts following the AWS Well-Architected best practices, and a third account is set up in the central model registry:
- Dev environment – Where an Amazon SageMaker Studio domain is set up to allow model development, model training, and testing of ML pipelines (train and inference), before a model is ready to be promoted to higher environments.
- Prod environment – Where the ML pipelines from dev are promoted to as a first step, and scheduled and monitored over time.
- Central model registry – Amazon SageMaker Model Registry is set up in a separate AWS account to track model versions generated across the dev and prod environments.
- CI/CD and source control – The deployment of ML pipelines across environments is handled through CI/CD set up with Jenkins, along with version control handled through GitHub. Code changes merged to the corresponding environment git branch triggers a CI/CD workflow to make appropriate changes to the given target environment.
- Batch predictions with model monitoring – The inference pipeline built with Amazon SageMaker Pipelines runs on a scheduled basis to generate predictions along with model monitoring using SageMaker Model Monitor to detect data drift.
- Automated retraining mechanism – The training pipeline built with SageMaker Pipelines is triggered whenever a data drift is detected in the inference pipeline. After it’s trained, the model is registered into the central model registry to be approved by a model approver. When it’s approved, the updated model version is used to generate predictions through the inference pipeline.
- Infrastructure as code – The infrastructure as code (IaC), created using HashiCorp Terraform, supports the scheduling of the inference pipeline with EventBridge, triggering of the train pipeline based on an EventBridge rule and sending notifications using Amazon Simple Notification Service (Amazon SNS) topics.
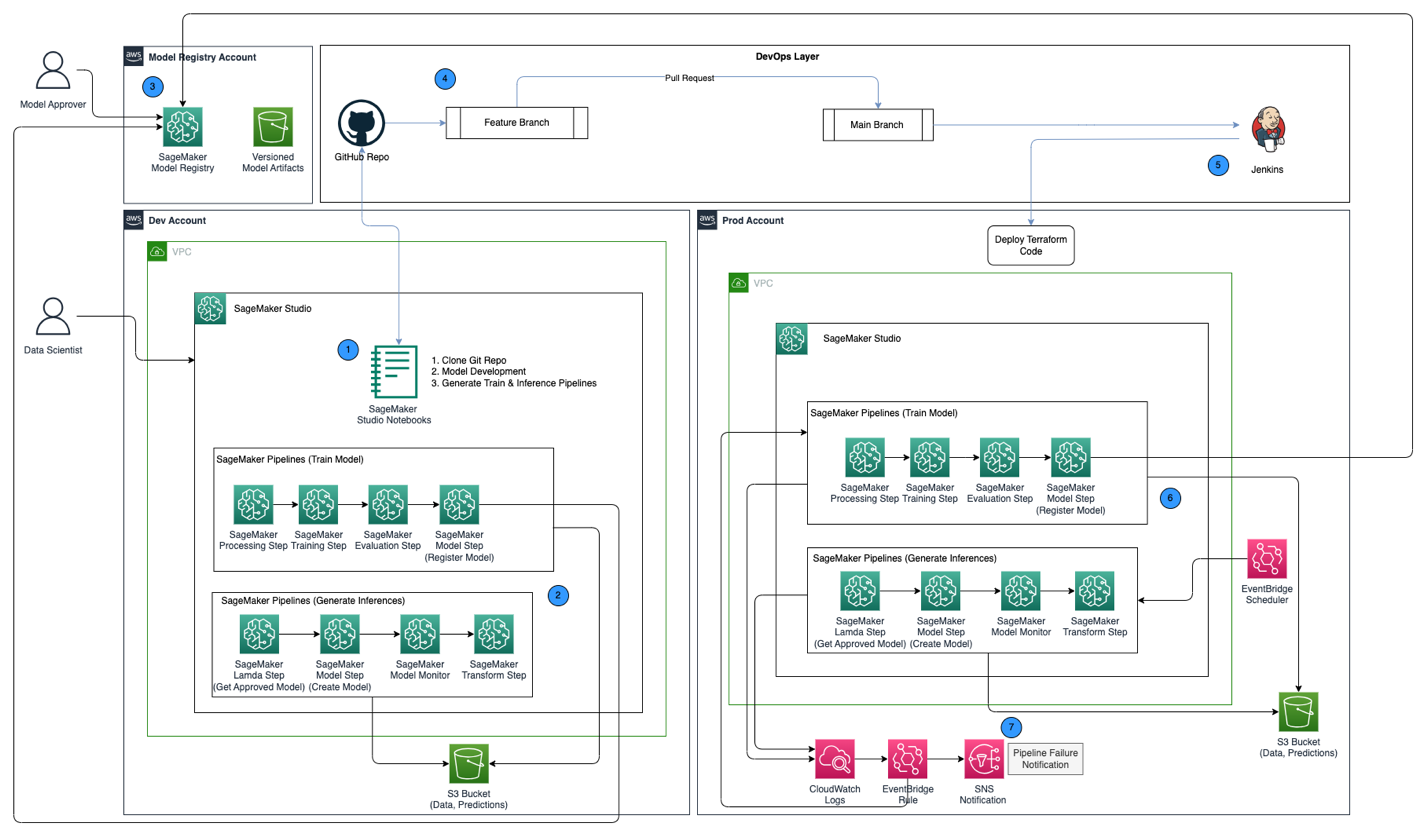
The MLOps workflow includes the following steps:
- Access the SageMaker Studio domain in the development account, clone the GitHub repository, go through the process of model development using the sample model provided, and generate the train and inference pipelines.
- Run the train pipeline in the development account, which generates the model artifacts for the trained model version and registers the model into SageMaker Model Registry in the central model registry account.
- Approve the model in SageMaker Model Registry in the central model registry account.
- Push the code (train and inference pipelines, and the Terraform IaC code to create the EventBridge schedule, EventBridge rule, and SNS topic) into a feature branch of the GitHub repository. Create a pull request to merge the code into the main branch of the GitHub repository.
- Trigger the Jenkins CI/CD pipeline, which is set up with the GitHub repository. The CI/CD pipeline deploys the code into the prod account to create the train and inference pipelines along with Terraform code to provision the EventBridge schedule, EventBridge rule, and SNS topic.
- The inference pipeline is scheduled to run on a daily basis, whereas the train pipeline is set up to run whenever data drift is detected from the inference pipeline.
- Notifications are sent through the SNS topic whenever there is a failure with either the train or inference pipeline.
Prerequisites
For this solution, you should have the following prerequisites:
- Three AWS accounts (dev, prod, and central model registry accounts)
- A SageMaker Studio domain set up in each of the three AWS accounts (see Onboard to Amazon SageMaker Studio or watch the video Onboard Quickly to Amazon SageMaker Studio for setup instructions)
- Jenkins (we use Jenkins 2.401.1) with administrative privileges installed on AWS
- Terraform version 1.5.5 or later installed on Jenkins server
For this post, we work in the us-east-1 Region to deploy the solution.
Provision KMS keys in dev and prod accounts
Our first step is to create AWS Key Management Service (AWS KMS) keys in the dev and prod accounts.
Create a KMS key in the dev account and give access to the prod account
Complete the following steps to create a KMS key in the dev account:
- On the AWS KMS console, choose Customer managed keys in the navigation pane.
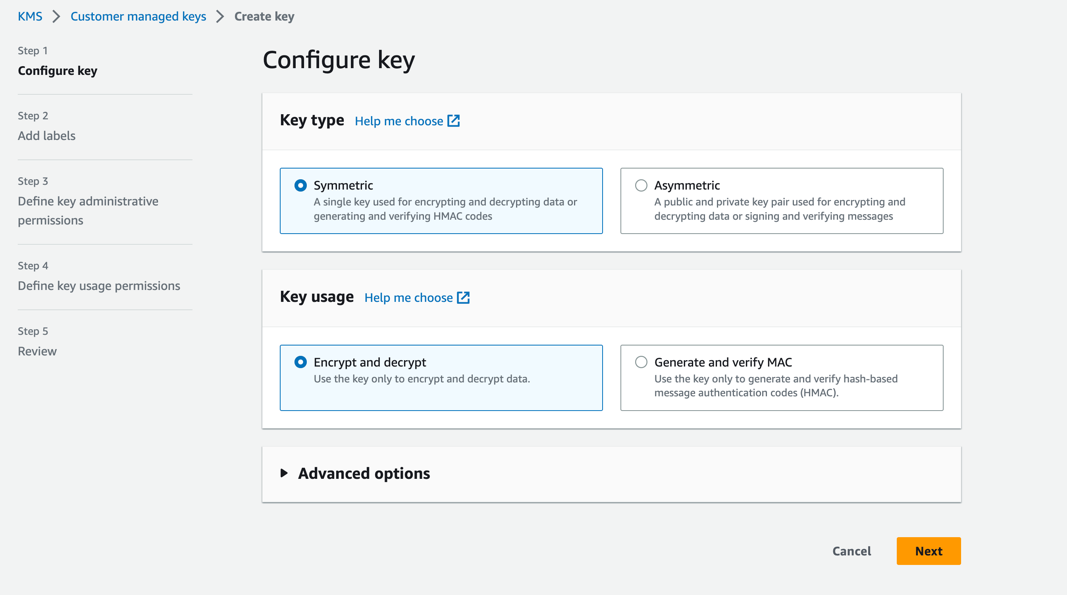
- Choose Create key.
- For Key type, select Symmetric.
- For Key usage, select Encrypt and decrypt.
- Choose Next.
- Enter the production account number to give the production account access to the KMS key provisioned in the dev account. This is a required step because the first time the model is trained in the dev account, the model artifacts are encrypted with the KMS key before being written to the S3 bucket in the central model registry account. The production account needs access to the KMS key in order to decrypt the model artifacts and run the inference pipeline.
- Choose Next and finish creating your key.

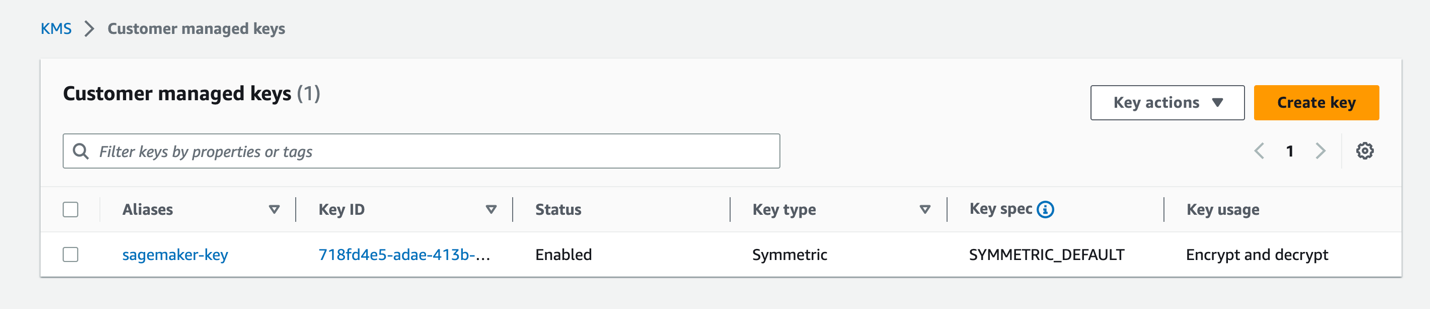
After the key is provisioned, it should be visible on the AWS KMS console.
Create a KMS key in the prod account
Go through the same steps in the previous section to create a customer managed KMS key in the prod account. You can skip the step to share the KMS key to another account.
Set up a model artifacts S3 bucket in the central model registry account
Create an S3 bucket of your choice with the string sagemaker in the naming convention as part of the bucket’s name in the central model registry account, and update the bucket policy on the S3 bucket to give permissions from both the dev and prod accounts to read and write model artifacts into the S3 bucket.
The following code is the bucket policy to be updated on the S3 bucket:
Set up IAM roles in your AWS accounts
The next step is to set up AWS Identity and Access Management (IAM) roles in your AWS accounts with permissions for AWS Lambda, SageMaker, and Jenkins.
Lambda execution role
Set up Lambda execution roles in the dev and prod accounts, which will be used by the Lambda function run as part of the SageMaker Pipelines Lambda step. This step will run from the inference pipeline to fetch the latest approved model, using which inferences are generated. Create IAM roles in the dev and prod accounts with the naming convention arn:aws:iam::<account-id>:role/lambda-sagemaker-role and attach the following IAM policies:
- Policy 1 – Create an inline policy named
cross-account-model-registry-access, which gives access to the model package set up in the model registry in the central account: - Policy 2 – Attach AmazonSageMakerFullAccess, which is an AWS managed policy that grants full access to SageMaker. It also provides select access to related services, such as AWS Application Auto Scaling, Amazon S3, Amazon Elastic Container Registry (Amazon ECR), and Amazon CloudWatch Logs.
- Policy 3 – Attach AWSLambda_FullAccess, which is an AWS managed policy that grants full access to Lambda, Lambda console features, and other related AWS services.
- Policy 4 – Use the following IAM trust policy for the IAM role:
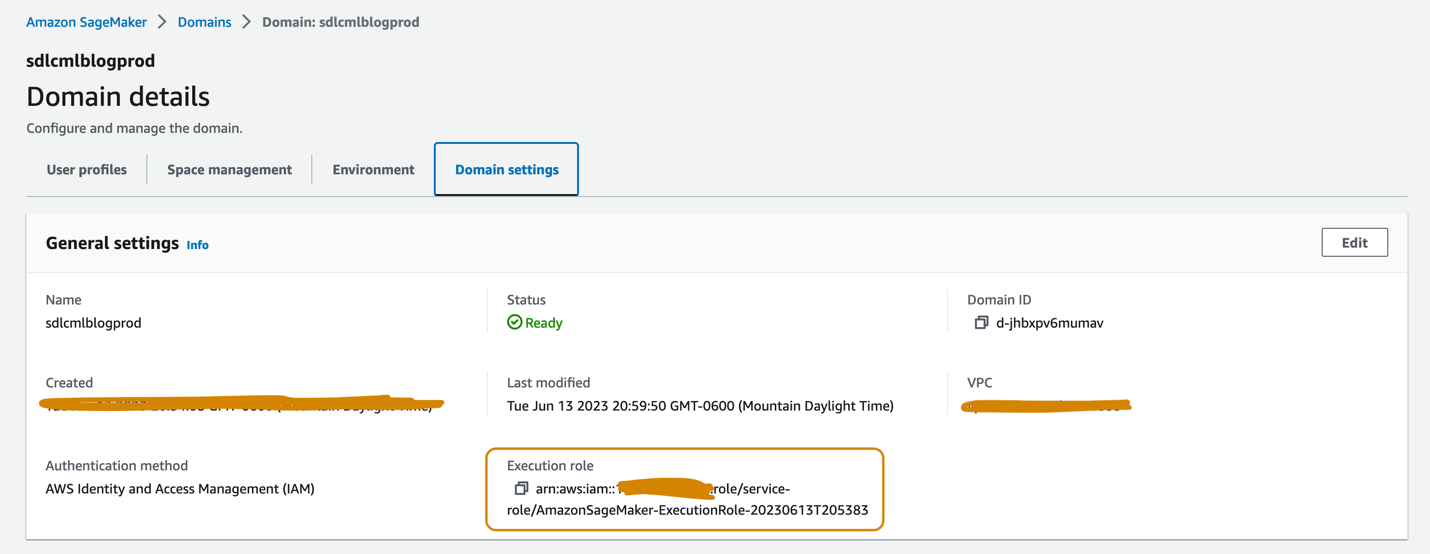
SageMaker execution role
The SageMaker Studio domains set up in the dev and prod accounts should each have an execution role associated, which can be found on the Domain settings tab on the domain details page, as shown in the following screenshot. This role is used to run training jobs, processing jobs, and more within the SageMaker Studio domain.
Add the following policies to the SageMaker execution role in both accounts:
- Policy 1 – Create an inline policy named
cross-account-model-artifacts-s3-bucket-access, which gives access to the S3 bucket in the central model registry account, which stores the model artifacts: - Policy 2 – Create an inline policy named
cross-account-model-registry-access, which gives access to the model package in the model registry in the central model registry account: - Policy 3 – Create an inline policy named
kms-key-access-policy, which gives access to the KMS key created in the previous step. Provide the account ID in which the policy is being created and the KMS key ID created in that account. - Policy 4 – Attach AmazonSageMakerFullAccess, which is an AWS managed policy that grants full access to SageMaker and select access to related services.
- Policy 5 – Attach AWSLambda_FullAccess, which is an AWS managed policy that grants full access to Lambda, Lambda console features, and other related AWS services.
- Policy 6 – Attach CloudWatchEventsFullAccess, which is an AWS managed policy that grants full access to CloudWatch Events.
- Policy 7 – Add the following IAM trust policy for the SageMaker execution IAM role:
- Policy 8 (specific to the SageMaker execution role in the prod account) – Create an inline policy named
cross-account-kms-key-access-policy, which gives access to the KMS key created in the dev account. This is required for the inference pipeline to read model artifacts stored in the central model registry account where the model artifacts are encrypted using the KMS key from the dev account when the first version of the model is created from the dev account.
Cross-account Jenkins role
Set up an IAM role called cross-account-jenkins-role in the prod account, which Jenkins will assume to deploy ML pipelines and corresponding infrastructure into the prod account.
Add the following managed IAM policies to the role:
CloudWatchFullAccessAmazonS3FullAccessAmazonSNSFullAccessAmazonSageMakerFullAccessAmazonEventBridgeFullAccessAWSLambda_FullAccess
Update the trust relationship on the role to give permissions to the AWS account hosting the Jenkins server:
Update permissions on the IAM role associated with the Jenkins server
Assuming that Jenkins has been set up on AWS, update the IAM role associated with Jenkins to add the following policies, which will give Jenkins access to deploy the resources into the prod account:
- Policy 1 – Create the following inline policy named
assume-production-role-policy: - Policy 2 – Attach the
CloudWatchFullAccessmanaged IAM policy.
Set up the model package group in the central model registry account
From the SageMaker Studio domain in the central model registry account, create a model package group called mammo-severity-model-package using the following code snippet (which you can run using a Jupyter notebook):
Set up access to the model package for IAM roles in the dev and prod accounts
Provision access to the SageMaker execution roles created in the dev and prod accounts so you can register model versions within the model package mammo-severity-model-package in the central model registry from both accounts. From the SageMaker Studio domain in the central model registry account, run the following code in a Jupyter notebook:
Set up Jenkins
In this section, we configure Jenkins to create the ML pipelines and the corresponding Terraform infrastructure in the prod account through the Jenkins CI/CD pipeline.
- On the CloudWatch console, create a log group named
jenkins-logwithin the prod account to which Jenkins will push logs from the CI/CD pipeline. The log group should be created in the same Region as where the Jenkins server is set up.
- Install the following plugins on your Jenkins server:
- Set up AWS credentials in Jenkins using the cross-account IAM role (
cross-account-jenkins-role) provisioned in the prod account.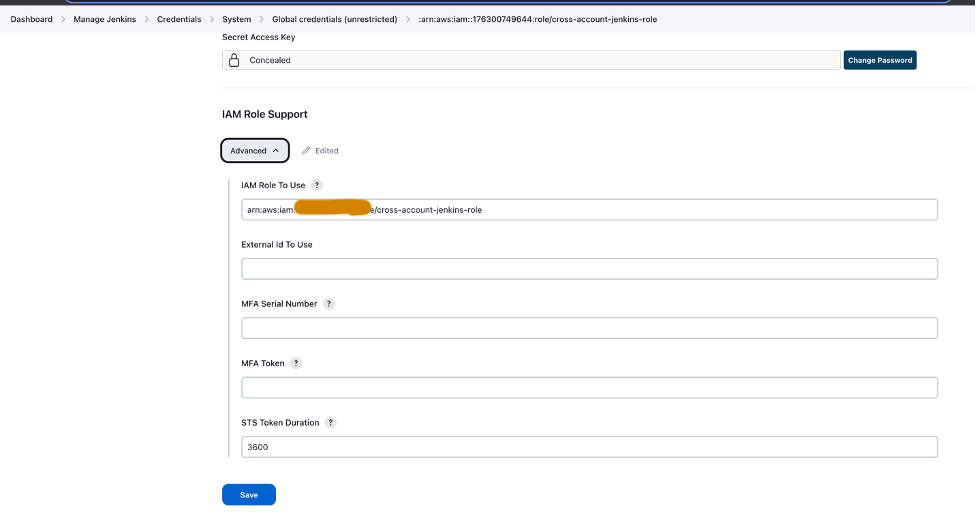
- For System Configuration, choose AWS.

- Provide the credentials and CloudWatch log group you created earlier.

- Set up GitHub credentials within Jenkins.

- Create a new project in Jenkins.
- Enter a project name and choose Pipeline.

- On the General tab, select GitHub project and enter the forked GitHub repository URL.
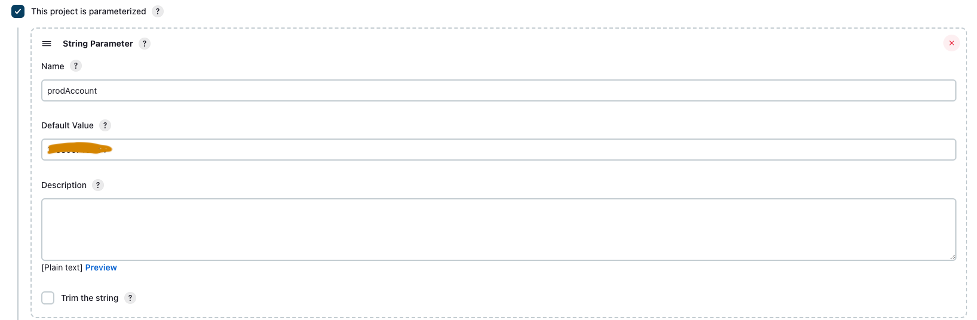
- Select This project is parameterized.
- On the Add Parameter menu, choose String Parameter.

- For Name, enter
prodAccount. - For Default Value, enter the prod account ID.
- Under Advanced Project Options, for Definition, select Pipeline script from SCM.
- For SCM, choose Git.
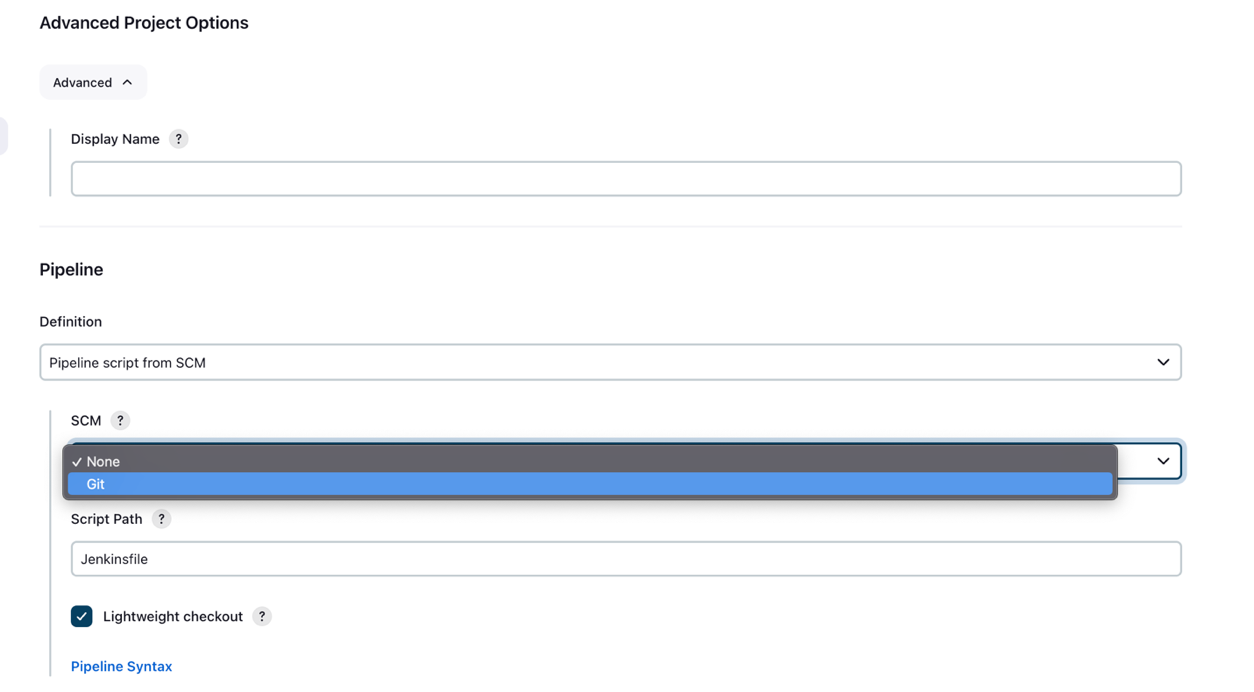
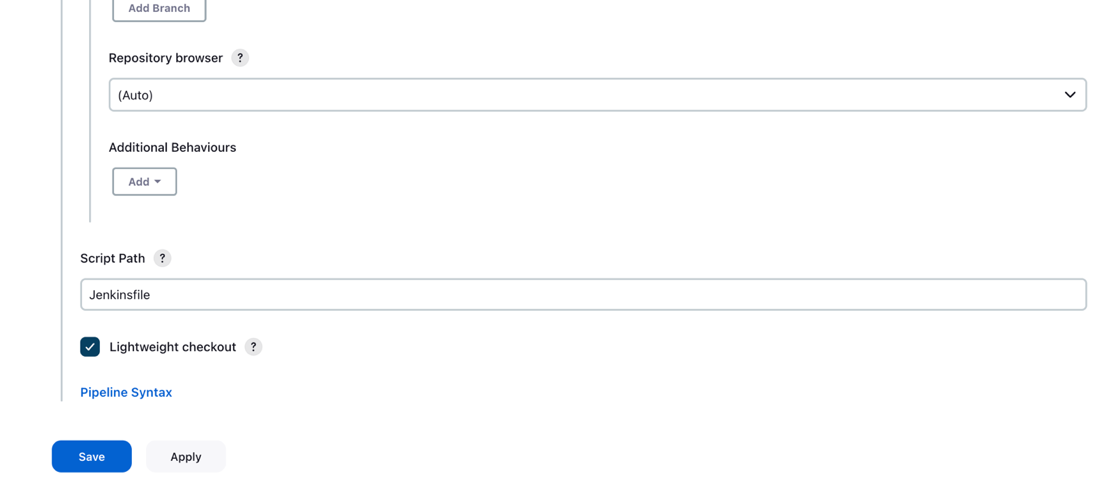
- For Repository URL, enter the forked GitHub repository URL.
- For Credentials, enter the GitHub credentials saved in Jenkins.
- Enter
mainin the Branches to build section, based on which the CI/CD pipeline will be triggered.
- For Script Path, enter
Jenkinsfile. - Choose Save.
The Jenkins pipeline should be created and visible on your dashboard.

Provision S3 buckets, collect and prepare data
Complete the following steps to set up your S3 buckets and data:
- Create an S3 bucket of your choice with the string
sagemakerin the naming convention as part of the bucket’s name in both dev and prod accounts to store datasets and model artifacts. - Set up an S3 bucket to maintain the Terraform state in the prod account.
- Download and save the publicly available UCI Mammography Mass dataset to the S3 bucket you created earlier in the dev account.
- Fork and clone the GitHub repository within the SageMaker Studio domain in the dev account. The repo has the following folder structure:
- /environments – Configuration script for prod environment
- /mlops-infra – Code for deploying AWS services using Terraform code
- /pipelines – Code for SageMaker pipeline components
- Jenkinsfile – Script to deploy through Jenkins CI/CD pipeline
- setup.py – Needed to install the required Python modules and create the run-pipeline command
- mammography-severity-modeling.ipynb – Allows you to create and run the ML workflow
- Create a folder called data within the cloned GitHub repository folder and save a copy of the publicly available UCI Mammography Mass dataset.
- Follow the Jupyter notebook
mammography-severity-modeling.ipynb. - Run the following code in the notebook to preprocess the dataset and upload it to the S3 bucket in the dev account:
The code will generate the following datasets:
-
- data/ mammo-train-dataset-part1.csv – Will be used to train the first version of model.
- data/ mammo-train-dataset-part2.csv – Will be used to train the second version of model along with the mammo-train-dataset-part1.csv dataset.
- data/mammo-batch-dataset.csv – Will be used to generate inferences.
- data/mammo-batch-dataset-outliers.csv – Will introduce outliers into the dataset to fail the inference pipeline. This will enable us to test the pattern to trigger automated retraining of the model.
- Upload the dataset
mammo-train-dataset-part1.csvunder the prefixmammography-severity-model/train-dataset, and upload the datasetsmammo-batch-dataset.csvandmammo-batch-dataset-outliers.csvto the prefixmammography-severity-model/batch-datasetof the S3 bucket created in the dev account: - Upload the datasets
mammo-train-dataset-part1.csvandmammo-train-dataset-part2.csvunder the prefixmammography-severity-model/train-datasetinto the S3 bucket created in the prod account through the Amazon S3 console.
- Upload the datasets
mammo-batch-dataset.csvandmammo-batch-dataset-outliers.csvto the prefixmammography-severity-model/batch-datasetof the S3 bucket in the prod account.
Run the train pipeline
Under <project-name>/pipelines/train, you can see the following Python scripts:
- scripts/raw_preprocess.py – Integrates with SageMaker Processing for feature engineering
- scripts/evaluate_model.py – Allows model metrics calculation, in this case
auc_score - train_pipeline.py – Contains the code for the model training pipeline
Complete the following steps:
- Upload the scripts into Amazon S3:
- Get the train pipeline instance:
- Submit the train pipeline and run it:
The following figure shows a successful run of the training pipeline. The final step in the pipeline registers the model in the central model registry account.

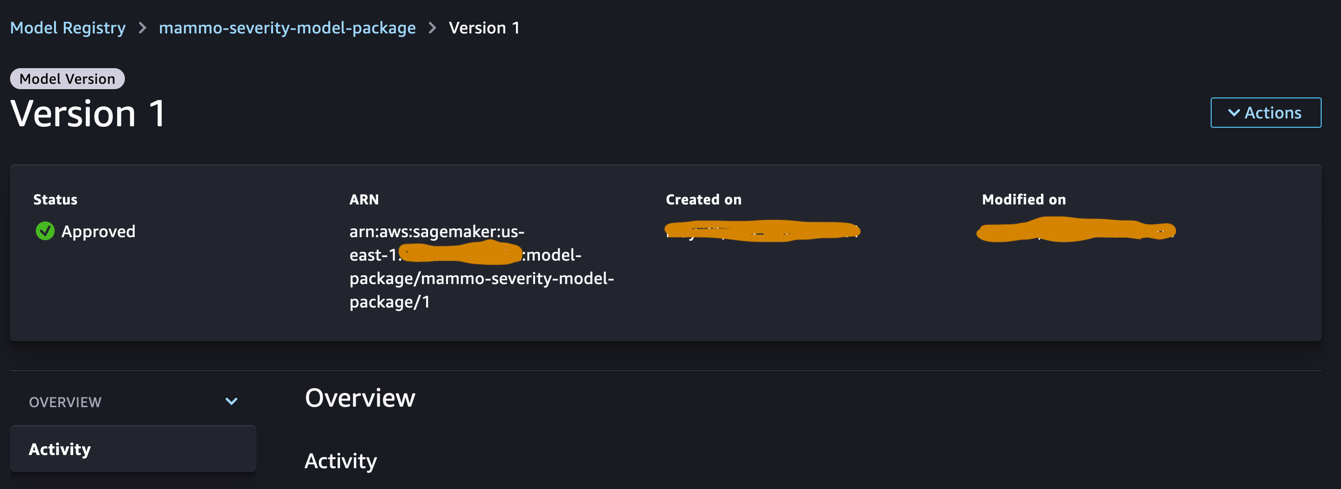
Approve the model in the central model registry
Log in to the central model registry account and access the SageMaker model registry within the SageMaker Studio domain. Change the model version status to Approved.

Once approved, the status should be changed on the model version.
Run the inference pipeline (Optional)
This step is not required but you can still run the inference pipeline to generate predictions in the dev account.
Under <project-name>/pipelines/inference, you can see the following Python scripts:
- scripts/lambda_helper.py – Pulls the latest approved model version from the central model registry account using a SageMaker Pipelines Lambda step
- inference_pipeline.py – Contains the code for the model inference pipeline
Complete the following steps:
- Upload the script to the S3 bucket:
- Get the inference pipeline instance using the normal batch dataset:
- Submit the inference pipeline and run it:
The following figure shows a successful run of the inference pipeline. The final step in the pipeline generates the predictions and stores them in the S3 bucket. We use MonitorBatchTransformStep to monitor the inputs into the batch transform job. If there are any outliers, the inference pipeline goes into a failed state.

Run the Jenkins pipeline
The environment/ folder within the GitHub repository contains the configuration script for the prod account. Complete the following steps to trigger the Jenkins pipeline:
- Update the config script
prod.tfvars.jsonbased on the resources created in the previous steps: - Once updated, push the code into the forked GitHub repository and merge the code into main branch.
- Go to the Jenkins UI, choose Build with Parameters, and trigger the CI/CD pipeline created in the previous steps.

When the build is complete and successful, you can log in to the prod account and see the train and inference pipelines within the SageMaker Studio domain.


Additionally, you will see three EventBridge rules on the EventBridge console in the prod account:
- Schedule the inference pipeline
- Send a failure notification on the train pipeline
- When the inference pipeline fails to trigger the train pipeline, send a notification

Finally, you will see an SNS notification topic on the Amazon SNS console that sends notifications through email. You’ll get an email asking you to confirm the acceptance of these notification emails.

Test the inference pipeline using a batch dataset without outliers
To test if the inference pipeline is working as expected in the prod account, we can log in to the prod account and trigger the inference pipeline using the batch dataset without outliers.
Run the pipeline via the SageMaker Pipelines console in the SageMaker Studio domain of the prod account, where the transform_input will be the S3 URI of the dataset without outliers (s3://<s3-bucket-in-prod-account>/mammography-severity-model/data/mammo-batch-dataset.csv).

The inference pipeline succeeds and writes the predictions back to the S3 bucket.

Test the inference pipeline using a batch dataset with outliers
You can run the inference pipeline using the batch dataset with outliers to check if the automated retraining mechanism works as expected.
Run the pipeline via the SageMaker Pipelines console in the SageMaker Studio domain of the prod account, where the transform_input will be the S3 URI of the dataset with outliers (s3://<s3-bucket-in-prod-account>/mammography-severity-model/data/mammo-batch-dataset-outliers.csv).

The inference pipeline fails as expected, which triggers the EventBridge rule, which in turn triggers the train pipeline.

After a few moments, you should see a new run of the train pipeline on the SageMaker Pipelines console, which picks up the two different train datasets (mammo-train-dataset-part1.csv and mammo-train-dataset-part2.csv) uploaded to the S3 bucket to retrain the model.

You will also see a notification sent to the email subscribed to the SNS topic.

To use the updated model version, log in to the central model registry account and approve the model version, which will be picked up during the next run of the inference pipeline triggered through the scheduled EventBridge rule.
Although the train and inference pipelines use a static dataset URL, you can have the dataset URL passed to the train and inference pipelines as dynamic variables in order to use updated datasets to retrain the model and generate predictions in a real-world scenario.
Clean up
To avoid incurring future charges, complete the following steps:
- Remove the SageMaker Studio domain across all the AWS accounts.
- Delete all the resources created outside SageMaker, including the S3 buckets, IAM roles, EventBridge rules, and SNS topic set up through Terraform in the prod account.
- Delete the SageMaker pipelines created across accounts using the AWS Command Line Interface (AWS CLI).
Conclusion
Organizations often need to align with enterprise-wide toolsets to enable collaboration across different functional areas and teams. This collaboration ensures that your MLOps platform can adapt to evolving business needs and accelerates the adoption of ML across teams. This post explained how to create an MLOps framework in a multi-environment setup to enable automated model retraining, batch inference, and monitoring with Amazon SageMaker Model Monitor, model versioning with SageMaker Model Registry, and promotion of ML code and pipelines across environments with a CI/CD pipeline. We showcased this solution using a combination of AWS services and third-party toolsets. For instructions on implementing this solution, see the GitHub repository. You can also extend this solution by bringing in your own data sources and modeling frameworks.
About the Authors
 Gayatri Ghanakota is a Sr. Machine Learning Engineer with AWS Professional Services. She is passionate about developing, deploying, and explaining AI/ ML solutions across various domains. Prior to this role, she led multiple initiatives as a data scientist and ML engineer with top global firms in the financial and retail space. She holds a master’s degree in Computer Science specialized in Data Science from the University of Colorado, Boulder.
 Sunita Koppar is a Sr. Data Lake Architect with AWS Professional Services. She is passionate about solving customer pain points processing big data and providing long-term scalable solutions. Prior to this role, she developed products in internet, telecom, and automotive domains, and has been an AWS customer. She holds a master’s degree in Data Science from the University of California, Riverside.
 Saswata Dash is a DevOps Consultant with AWS Professional Services. She has worked with customers across healthcare and life sciences, aviation, and manufacturing. She is passionate about all things automation and has comprehensive experience in designing and building enterprise-scale customer solutions in AWS. Outside of work, she pursues her passion for photography and catching sunrises.
- SEO Powered Content & PR Distribution. Get Amplified Today.
- PlatoData.Network Vertical Generative Ai. Empower Yourself. Access Here.
- PlatoAiStream. Web3 Intelligence. Knowledge Amplified. Access Here.
- PlatoESG. Carbon, CleanTech, Energy, Environment, Solar, Waste Management. Access Here.
- PlatoHealth. Biotech and Clinical Trials Intelligence. Access Here.
- Source: https://aws.amazon.com/blogs/machine-learning/promote-pipelines-in-a-multi-environment-setup-using-amazon-sagemaker-model-registry-hashicorp-terraform-github-and-jenkins-ci-cd/