Stable Diffusion has quickly become the preferred image generator for people deeply interested in the world of artificial intelligence-generated visual art. The powerful software’s flexibility, high compatibility with emerging technologies, and ability to run locally have earned it a privileged spot among AI enthusiasts.
Most implementations are optimized for Windows, however, given that graphics card maker Nvidia currently dominates the AI space, and their GPUs, and libraries don’t run on Apple hardware.
Additionally, Apple is very restrictive in maintaining control over its products—both hardware and software. As the InvokeAI team explains, Apple’s CoreML models “require a specific implementation of Stable Diffusion that Apple has created.” This leaves users having to choose between efficient but limited implementations, or slower but more flexible options.
But in the same way that there are workarounds for high-powered gaming on a Mac, there are ways to run Stable Diffusion—especially its new and powerful SDXL model. Here are some of the best Stable Diffusion implementations for Apple Silicon Mac users, tailored to a mix of needs and goals.
Diffusion Bee: Peak Mac experience

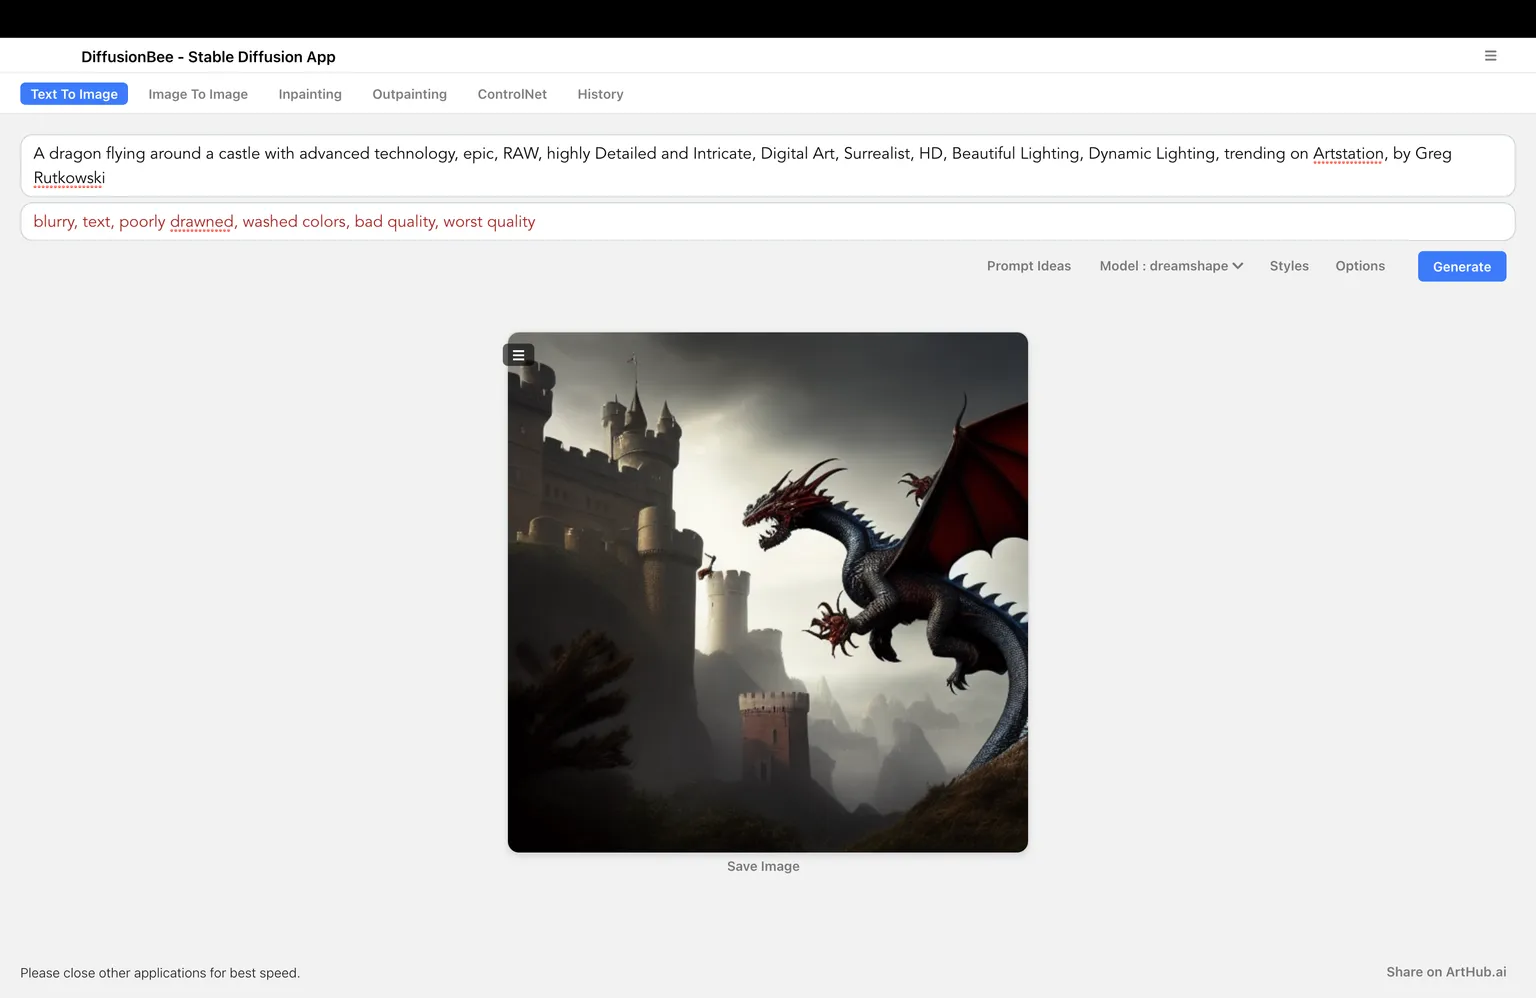
Diffusion Bee epitomizes one of Apple’s most famous slogans: it just works. There’s no need to mess with command lines, complicated interfaces, library installations, intricate settings, or ugly GUIs. It is by far the cleanest and most aesthetically pleasing app in the realm of Stable Diffusion.
If you’re the type of user who wants to sketch dragons, waifus, or beautiful landscapes without delving into the technicalities under the hood, this app is for you. Just find it on the App Store, install it, and you’re set. The app does everything for you: it downloads models, samplers, configurations, libraries, optimizes models, and might even make you a cup of coffee while you wait.
How to install Diffusion Bee and run the best Stable Diffusion models:
- Search for Diffusion Bee in the App Store and install it.
- To install custom models, visit the Civitai “Share your models” page.
- Download the model you like the most.
- Open Diffusion Bee and import the model by clicking on the “Model” tab and then “Add New Model.”
Our favorite models are Photon for photorealism and Dreamshaper for digital art. Unfortunately, Diffusion bee does not support SDXL yet. However, you still have hundreds of SD v1.5 models at your disposal.
Pros:
- Easy to use
- Simple interface
- Compatible with custom models
- Compatible with Apple’s CoreML
Cons:
- No SDXL support
- Limited flexibility for advanced workflows
Draw Things: A Mac app for the seasoned Stable Diffusion user
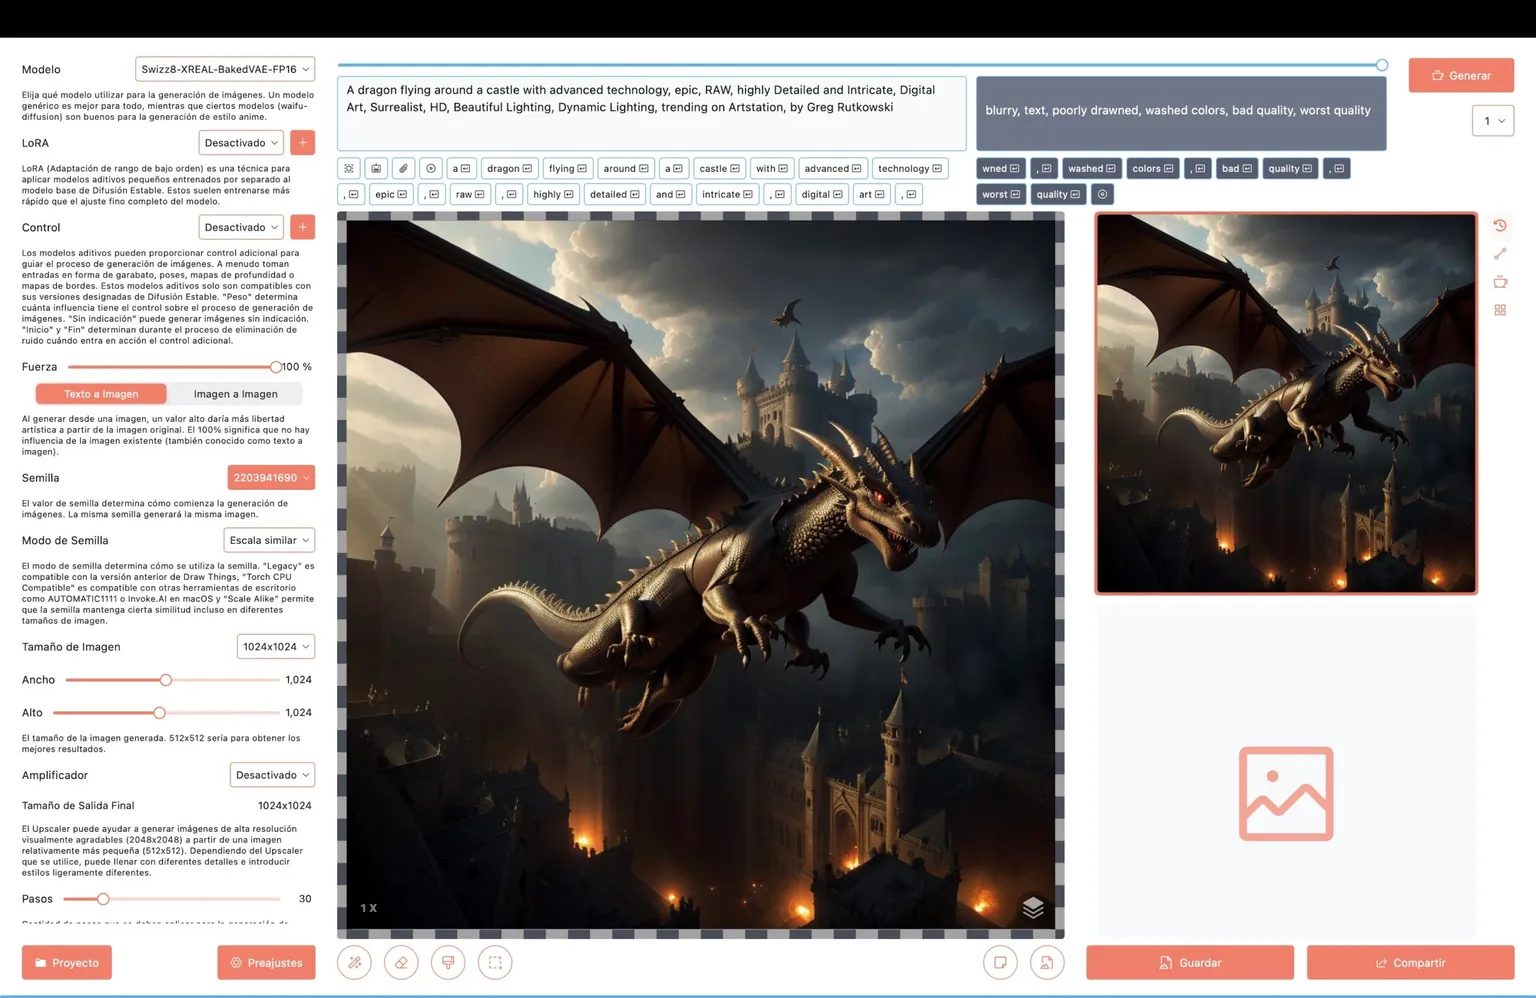
Draw Things is a slightly more advanced app. It is compatible with CoreML, which means it will run the models, optimizing them to how Macs “think.” This also means that images will be created faster than using other non-optimized models.
The interface is less user-friendly than Diffusion Bee, but it’s perfect for those looking for more flexibility and a variety of options for creating new things. It’s compatible with embeddings, LoRAs, and easy-to-restore models and offers many options to explore.
Additionally, it provides native support for SDXL along with the refiner.
How to install Draw Things and add custom models:
- Download it from the App Store or from its official site.
- Draw Things allows in-app downloading without the need to visit third-party websites like Civit AI or Hugging Face. But it also lets you download models from third-party websites and import them after optimization. simple
Pros:
- Highly flexible
- CoreML-compatible
- Runs on other Apple devices like iPads
- Allows in-app download of custom models
- Optimized for Apple Silicon
Cons:
- Complex interface
- Visually less appealing
- Duplicates files when importing models (one being the original model and a new one being the optimized version), consuming more storage and possibly messing up filer organization if used in conjunction with other Stable Diffusion implementations
Automatic 1111: The Swiss Army knife of UIs
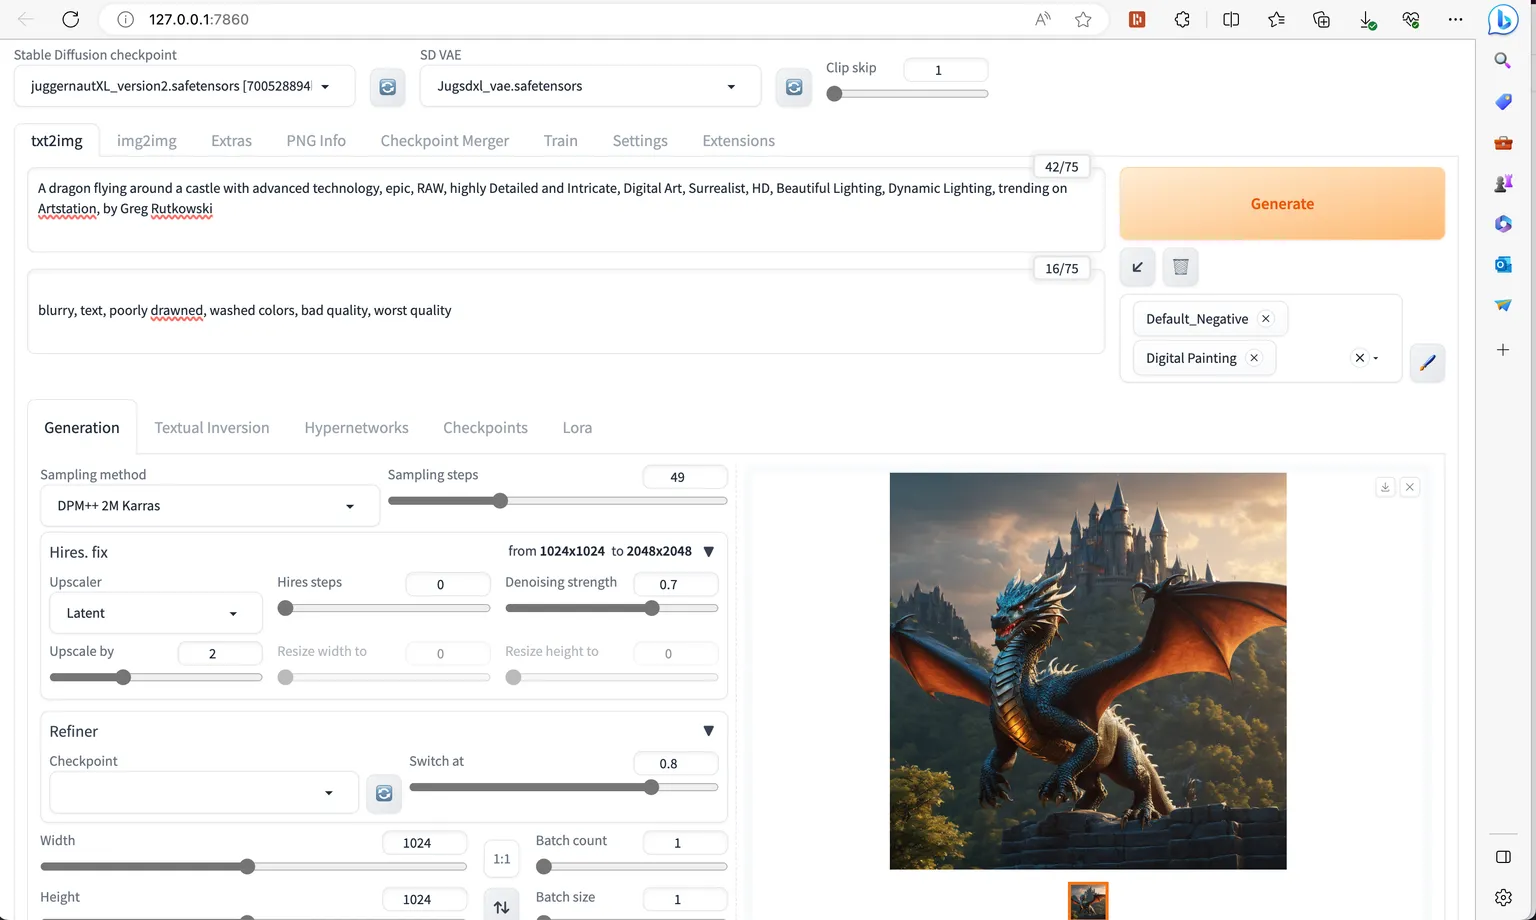
Automatic 1111 is popular among Stable Diffusion aficionados for its compatibility with third-party tools, making it ideal for those serious about image generation.
How to Install:
The installation of A1111 is a bit more complex, and you’ll need to follow this detailed guide.
In summary:
- First, you need to install Homebrew. You can do one of two things:
- Make sure to add Homebrew to your PATH.
- Open a new terminal window and run this command in your terminal:
brew install cmake protobuf rust [email protected] git wget - Clone the web UI repository by running this command in your terminal:
git clone https://github.com/AUTOMATIC1111/stable-diffusion-webui - Download your favorite models and place them in the “models” folder (located inside your Stable Diffusion parent folder). If you didn’t change it, the path should be: stable-diffusion-webui/models/Stable-diffusion.
- Run this command in your terminal to navigate to your A1111 folder:
cd stable-diffusion-webui - To launch the web UI, from within your A1111 folder, run this command in your terminal:
./webui.sh
A Python virtual environment will be created and activated using `venv`, and any remaining missing dependencies will be automatically downloaded and installed. - Now, every time you want to run A1111, simply double-click on the webui.sh file located in your “stable-diffusion-webui” folder and wait until it loads. You will see an IP address in your terminal. Copy and paste it into your browser.
- Go crazy generating your best images.
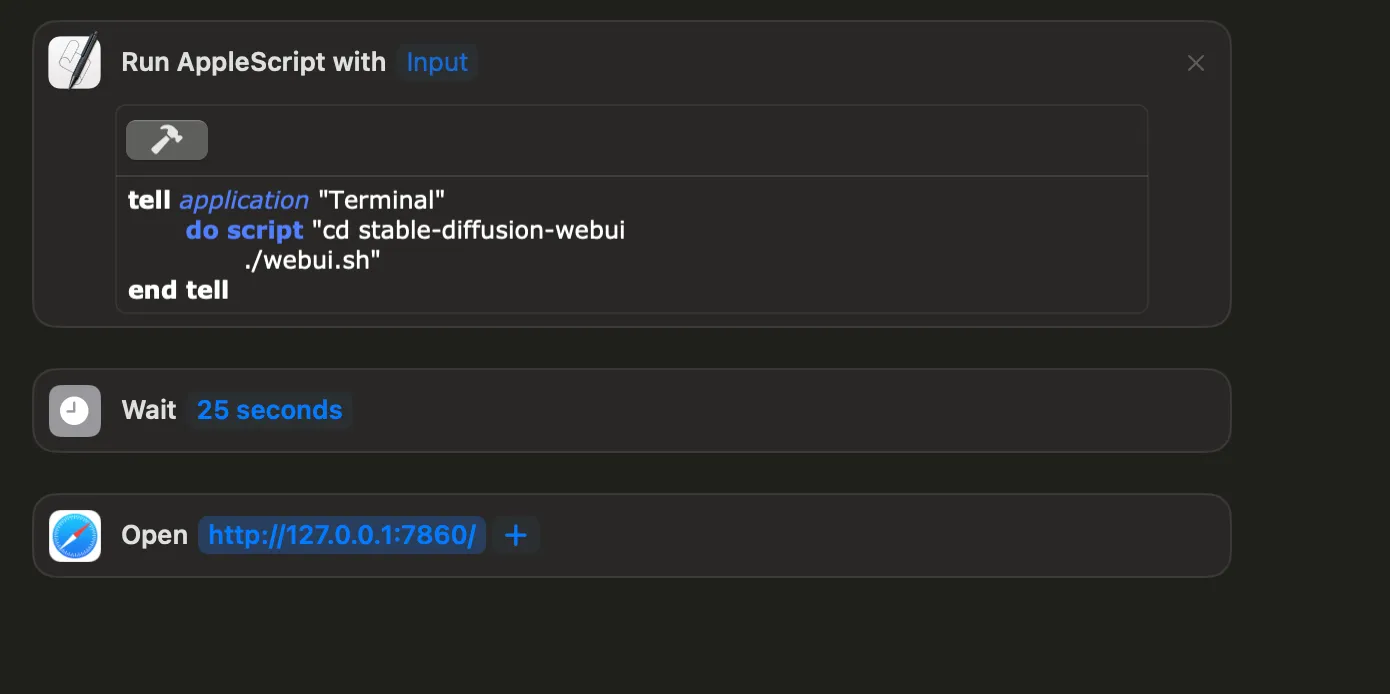
Tip: If you want to automate the process, you can download this file and paste it in your dock. It will run the script, copy the URL, and execute the UI in your default browser.
If you don’t trust a script posted to the web, you can build your own script by opening the Automator App, creating a new Workflow, and copying this configuration:
Pros:
- Extreme compatibility with Stable Diffusion updates and third party developments.
- Large community support which makes it easy to master or at least to understand.
Cons:
- Poor memory management (it’s slow as heeeeell)
- Complex installation
- Not optimized for Apple Silicon
If you want more information about Automatic 1111, check out our comprehensive guide with everything you need to know to master this wonderful tool.
Honorable Mentions:
There are a lot of implementations available—we just highlighted what we believe to be the best ones to begin with. However, a few honorable mentions in the sea of options have their own merits and should also be considered.
Check them out, install them, and you may probably fall in love with one of them if you are not satisfied with our top three:
ComfyUI:

ComfyUI is the ultimate tool for those who want to have absolute control over every minute part of the image creation process with AI. Interestingly, it may be more efficient than A1111, although that will depend on your workflow.
The app is not optimized for Mac, but it is probably the only one that allows you to adapt all the steps your machine will need to follow to generate its image. It can combine generations of SD 1.5 with SDXL, you can create conditional steps, and much more.
Installation is complex but is detailed in this guide.
InvokeAI:

InvokeAI is an excellent implementation that has become very popular for its stability and ease of use for outpainting and inpainting edits. It doesn’t support CoreML, but it is a very good alternative to A1111 if you’re looking for that extra level of editing.
Being closed source, it does not accept third-party plugins but is compatible with SDXL.
The installation is via commands, although the InvokeAI team has tried to simplify it as much as possible. Here is the link to their official installation guide for those who want to try it.
Mochi Diffusion:

Mochi Diffusion is a native implementation for running Stable Diffusion models compatible with CoreML. It does not offer an option to convert models, but there is a catalog powered by the Hugging Face community for those who want to use this implementation. The split-einsum models are the best for Apple Silicon, although it also supports general models for those who want some flexibility in choosing to render with a GPU, CPU, and achieving good results at different resolutions.
It is installed via the project’s official repo, and the customized models for Apple Silicon can be downloaded from Hugging Face and copied into the corresponding folder.
Conclusion
There is no such thing as a perfect app, and AI artists tend to run different implementations to harness the best of each one. Considering the struggles of having a Mac in a PC-dominated world, you might consider taking the leap and have a few apps installed —just like most of the AI artists out there.
Choosing the right Stable Diffusion implementation for your Apple Silicon Mac depends on what kind of user you are and what you want to accomplish. But with the options presented above, you can surely find something that fits your needs.
Stay on top of crypto news, get daily updates in your inbox.
- SEO Powered Content & PR Distribution. Get Amplified Today.
- PlatoData.Network Vertical Generative Ai. Empower Yourself. Access Here.
- PlatoAiStream. Web3 Intelligence. Knowledge Amplified. Access Here.
- PlatoESG. Automotive / EVs, Carbon, CleanTech, Energy, Environment, Solar, Waste Management. Access Here.
- PlatoHealth. Biotech and Clinical Trials Intelligence. Access Here.
- ChartPrime. Elevate your Trading Game with ChartPrime. Access Here.
- BlockOffsets. Modernizing Environmental Offset Ownership. Access Here.
- Source: https://decrypt.co/154766/apple-mac-silicon-ai-stable-diffusion-install-run-images