Dealing with lengthy and complicated tables in Word is a hassle. It’s often easier to manage and manipulate data in Excel. So, the question becomes: how can you convert Word tables to Excel quickly and efficiently?
Converting your Word document to Excel isn’t as complicated as you might expect. In fact, there are several ways to transfer your data, including copy-pasting or utilizing online tools. Select the method that best fits your requirements.
When do you need to convert Word tables to Excel?
Microsoft Excel is a brilliant tool for storing and processing massive data sets and performing complex calculations. It can handle a vast amount of data. With thousands of rows and columns per worksheet, it can perform basic and advanced calculations, such as arithmetic, statistics, logic, and financial functions. Its comprehensive features make it an indispensable tool for data analysis and numerical calculations.
While Microsoft Word is ideal for creating text-based documents and reports, it is not meant to handle large amounts of data or perform complex calculations. So, the need to convert Word tables to Excel arises due to several reasons:
- When you need to perform complicated statistical analyses like standard deviation, regression, and correlation.
- If the data you are working with needs to be sorted, filtered, or categorized.
- When you want to use pivot tables to summarize, analyze, explore, and present your data.
- When you must add critical insights to the Word document, and present it along with a link to the Excel sheet for further review.
- If the document you’re working with contains tables that are too large to manage in Word.
- When you need to create visual representations of your data, such as charts, graphs, or histograms.
- To use Excel’s advanced features like conditional formatting, data validation, and what-if analysis.
- When you need to work with multiple team members on the same dataset collaboratively.
No matter your reason, converting your Word tables to Excel can significantly improve your productivity, efficiency, and data analysis capabilities. Now, let’s dive into the different methods to convert Word tables to Excel.
1. Manually copying and pasting the tables
This is the most straightforward method to transfer your Word tables to Excel. While it may be time-consuming for larger tables, it’s quick and efficient for smaller ones.
Here’s how to do it:
- Open your Word document and locate the table you want to copy.
- Click at the beginning of the table, hold down your mouse button, and drag to the end of the table to select it.
- Right-click the selected area and choose ‘Copy’ from the context menu.
- Open Excel and place your cursor in the cell where you want the table to appear.
- Right-click and choose ‘Paste’. The table data will now be in Excel, and you can adjust the column widths and row heights as needed.
Please note that this method can sometimes lead to formatting issues, especially if your table contains merged cells or complex layouts. So, ensure to review your data in Excel after pasting.
2. Save the Word document as a .txt file and open it in Excel
Excel lets you import tables from .txt files. So, save your Word document that contains the table as a .txt file and then import it into Excel.
It gives you the freedom to choose the column data format and delimiters. So basic formatting like number, date, and text formats can be retained.
Here’s how to do it:
- Open the Word document and locate the table you want to convert. Select the whole table.
- Click on the layout tab, then click ‘Convert to Text’. In the dialog box that pops up, select the delimiter you want and click ‘OK’.
- Save the document as a .txt file by clicking on ‘File’, then ‘Save As’, and choose ‘Plain Text (.txt)’ from the drop-down menu.
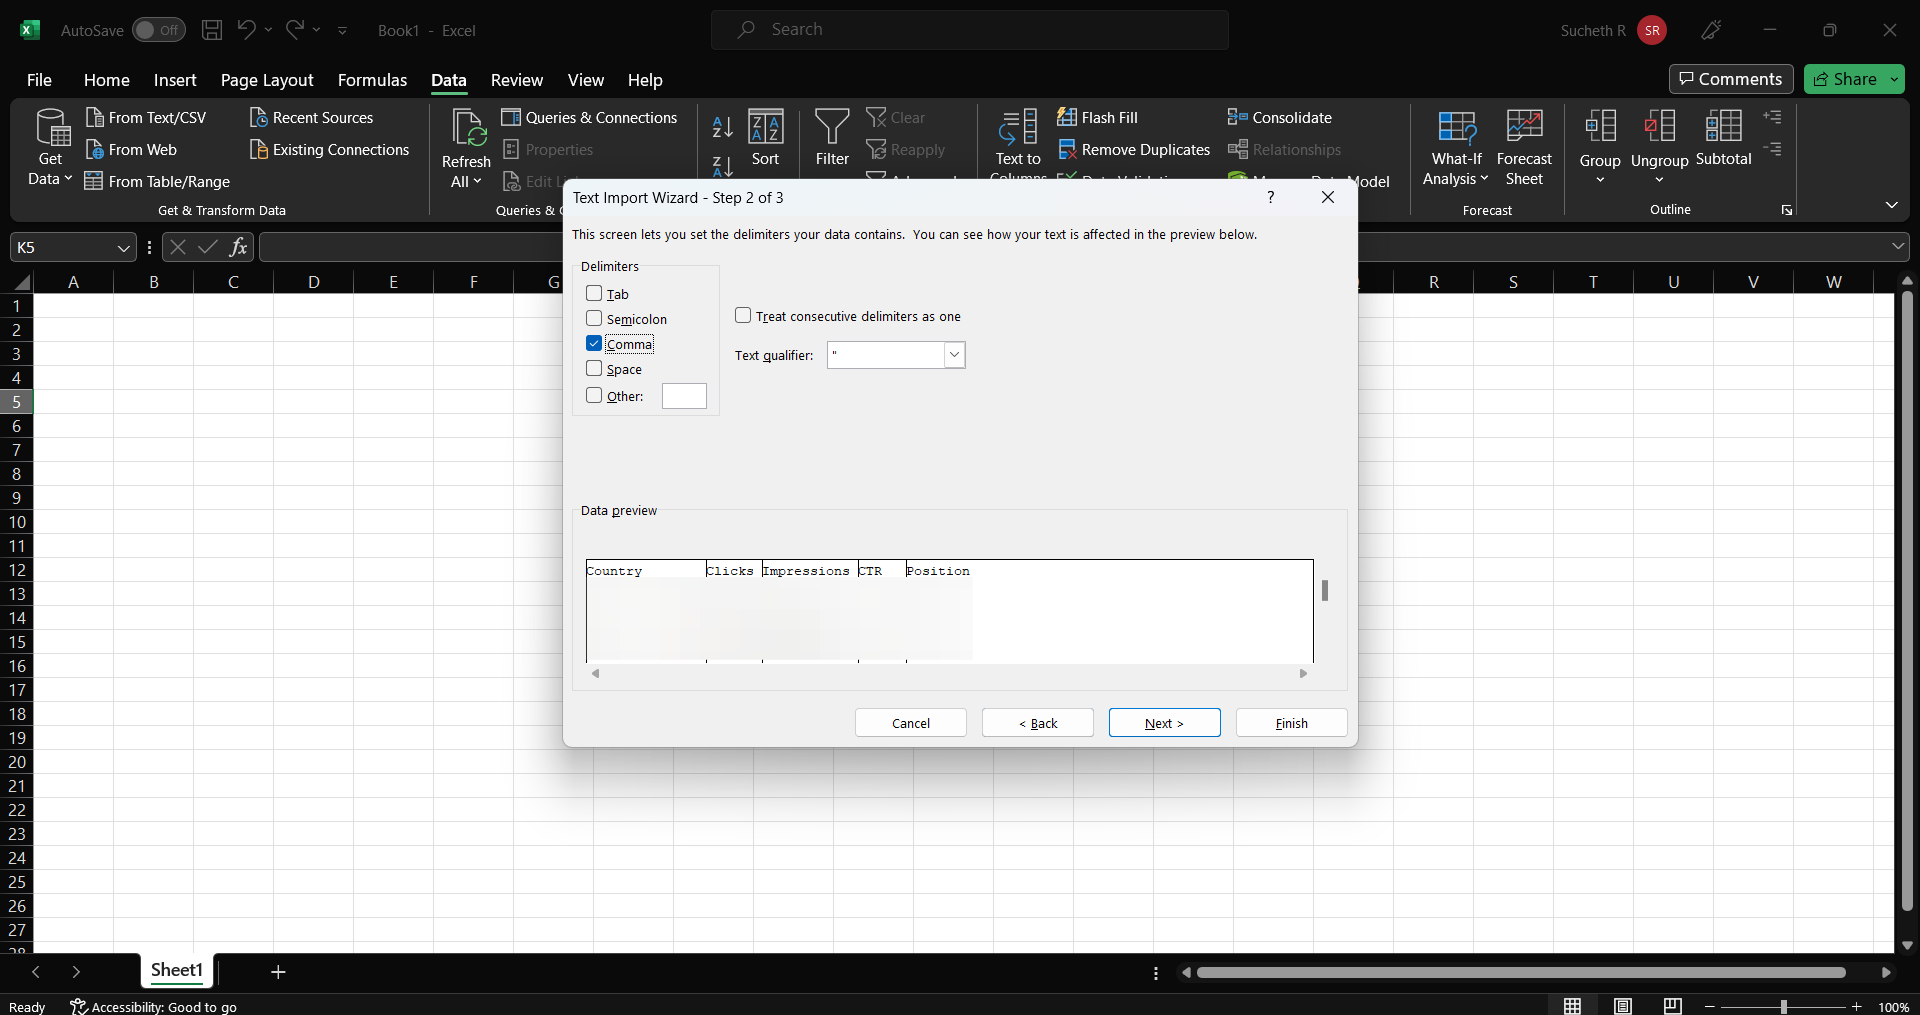
- Open Excel, click ‘File’, then ‘Open’, and locate the .txt file you saved. An import wizard will pop up.
- Follow the import wizard’s instructions: select ‘Delimited’, click ‘Next’, choose your delimiter, and click ‘Next’ again. You can also set the data format for each column.
- Click ‘Finish’ to complete the import process. You should now see your table in Excel.
In text files, characters like commas, tabs, or spaces act as delimiters, separating words or phrases. When importing these files into Excel, the chosen delimiter helps divide the data into separate cells.
While this method is straightforward, you’ll have to spend considerable time manually cleaning the data in documents with a lot of text and images besides the table. Also, lengthy tables, merged cells, and complex layouts may not be accurately represented when converted into the .txt format.
3. Save the document as a PDF and use Excel’s ‘Get Data’ feature
Excel has a built-in function called ‘Get Data’, which can import data from various sources, including PDF files. So, save your Word document as a PDF and then import your tables using the ‘Get Data’ function in Excel.
Here’s how:
- Open your Word document and go to ‘File’ > ‘Save As’ > ‘PDF’.
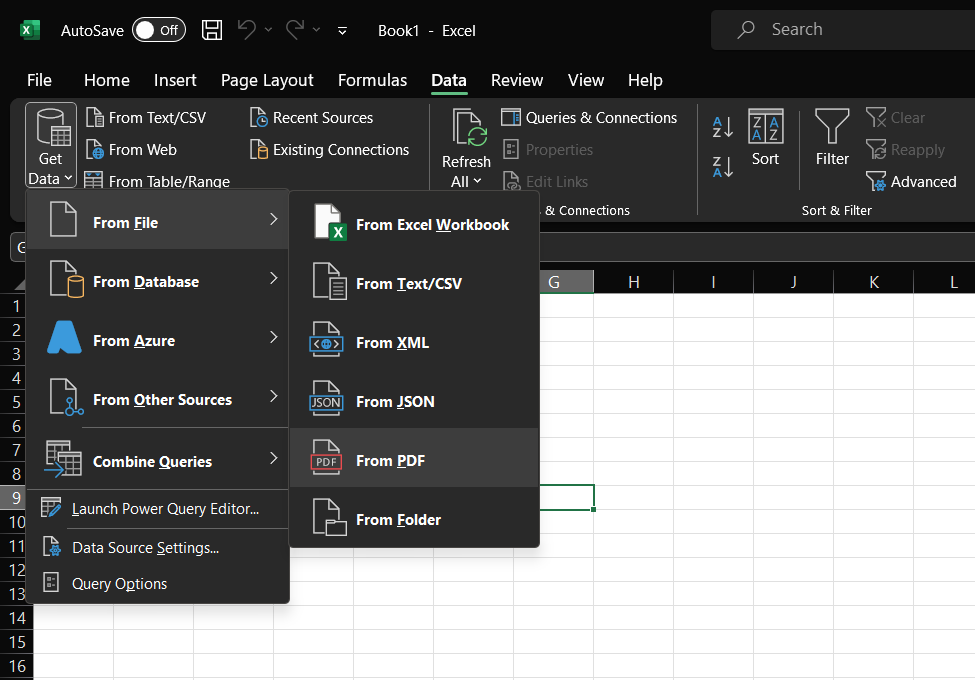
- Open Excel, navigate to the ‘Data’ tab, and select ‘Get Data’.
- Choose ‘From File’ > ‘From PDF’ in the drop-down menu.
- Locate and select the PDF file you just saved, then click ‘Import’.
- Excel will then display a Navigator window — select the tables you want to import and click ‘Load’ to edit/analyze the Word tables in Excel.
This method is especially useful when you have multiple tables in your Word document, as Excel’s ‘Get Data’ function can identify and import all tables at once. Plus, it also keeps the original formatting intact.
However, this method might not be perfect for documents with complex layouts or merged cells, as the ‘Get Data’ function may not accurately recognize such formatting.
Note: You can also extract tables from text files using the ‘Get Data’ feature.
If you want to avoid manually copying and pasting your tables or going through the process of saving and importing files, online conversion tools could be a good option.
These tools can automatically convert your Word document into an Excel file, saving you time and effort.

Some of the popular online converters include:
- Online2PDF
- Smallpdf
- Zamzar
- Convertio
These tools are straightforward to use. Generally, you need to:
- Visit the website of your chosen conversion tool.
- Click ‘Upload’ or ‘Choose File’ to select your Word document.
- Select ‘Excel’ or ‘.xlsx’ as the output format.
- Click on ‘Convert’ or ‘Start conversion’. The tool will then process your file and convert it into an Excel document.
- Once the conversion is complete, download the converted file to your device.
While these tools are great for quick conversions, they have a few limitations. For instance, they might not perfectly handle complex tables or preserve all formatting.
Also, if your document contains sensitive information, you should consider your privacy as these files are uploaded to a cloud server during conversion.
Manual methods and simple tools might not be enough when you want to simultaneously process complex tables or hundreds of documents.
Along with table extraction, you may need tools to identify, classify, and extract data at scale. This is where AI-powered automated tools come in.
If you’re grappling with complex document automation, Nanonets is what you need. It seamlessly extracts data from even the most complicated tables.
Combining OCR and AI, Nanonets can effectively read, understand, and extract information from your documents. So, be it a bank statement, purchase order, or invoice — with different layouts, languages, currencies, line items, and column names — Nanonets can handle it all.

Here is how you can use Nanonets:
- Upload your Word file(s) to the platform
- The AI model will automatically extract the data from the tables in the file(s).
- Review and validate the extracted data for accuracy
- Download the data in your preferred format, such as .xlsx or .csv
- Export the extracted data to your desired software or tool
What’s more? Every time you make a manual correction, the AI learns from it and improves its performance, making it more accurate over time.
If you’re a finance assistant, accountant, or data analyst, getting the data you want in Excel is only half the battle. Often, you must process the data further, analyze it, send it for approval, or export it to other software. With Nanonets, you can extract the data and automate these downstream tasks.
Nanonets offers powerful data import and export integrations, meaning you can conveniently move data between your preferred tools and platforms. It integrates with popular tools such as:
- Google Sheets
- QuickBooks
- Xero
- SAP
- Salesforce
- Sage
It also has a Zapier integration, enabling you to connect with thousands of other apps and services, automating many of the tasks in your workflow.
Nanonets’ powerful AI engine and seamless integrations make it a comprehensive tool for document processing, especially when dealing with complex or large quantities of data.
With automated validation, built-in task assignment, and multi-stage approval workflows, you can ensure your data is accurately captured, processed, and approved. You can reduce manual errors, save time, maintain transparency, and improve compliance.
Wrapping up
Whether you’re a financial analyst dealing with heaps of data, an accountant managing multiple invoices, or a doctoral student compiling research data, transferring tables from Word to Excel can be daunting. However, this process can be significantly simplified with the correct methods and tools.
Processing your data faster allows you to focus more on analysis, decision-making, or other important tasks that require your expertise. Hopefully, this quick tutorial has been a good starting point for you.
If you want to learn about the advanced features and capabilities of Nanonets, feel free to schedule a demo with our team. We’d be happy to walk you through how our AI-powered tool can streamline document processing tasks and significantly improve productivity.
- SEO Powered Content & PR Distribution. Get Amplified Today.
- PlatoData.Network Vertical Generative Ai. Empower Yourself. Access Here.
- PlatoAiStream. Web3 Intelligence. Knowledge Amplified. Access Here.
- PlatoESG. Carbon, CleanTech, Energy, Environment, Solar, Waste Management. Access Here.
- PlatoHealth. Biotech and Clinical Trials Intelligence. Access Here.
- Source: https://nanonets.com/blog/convert-word-tables-excel/